Clients and approvalsVideo · 50 sec · 8 steps · November 4, 2026
Approve posts from the email
Clients approve posts or ask for changes straight from the approval email, with no sign-in.
01
Send posts for approval
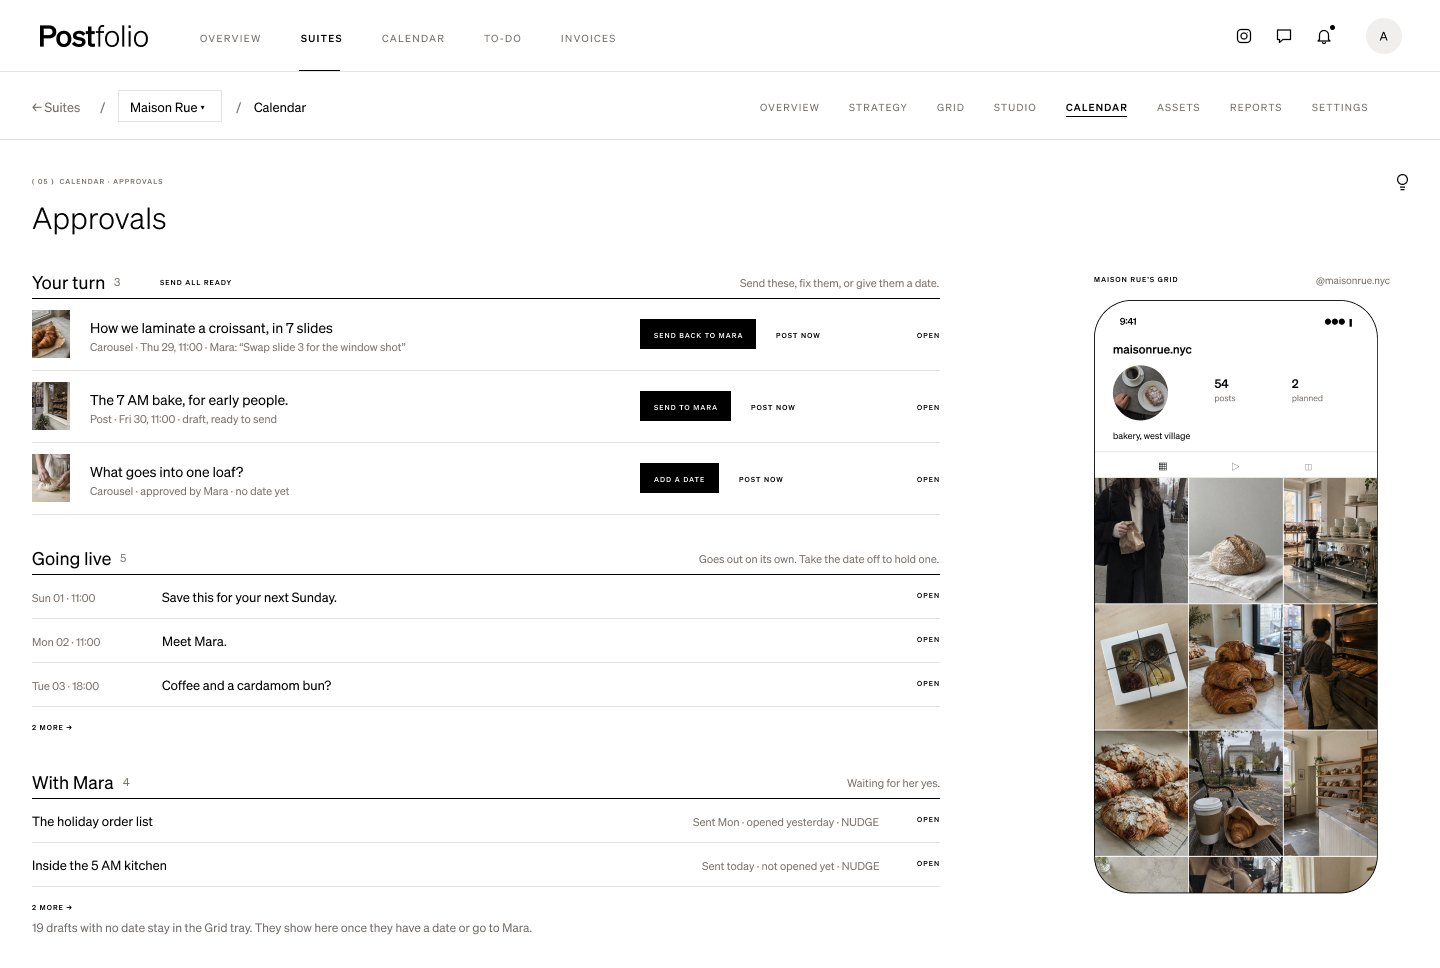
Send posts to the client from Calendar › Approvals, or press Send to client in the post editor.
02
The client gets one email
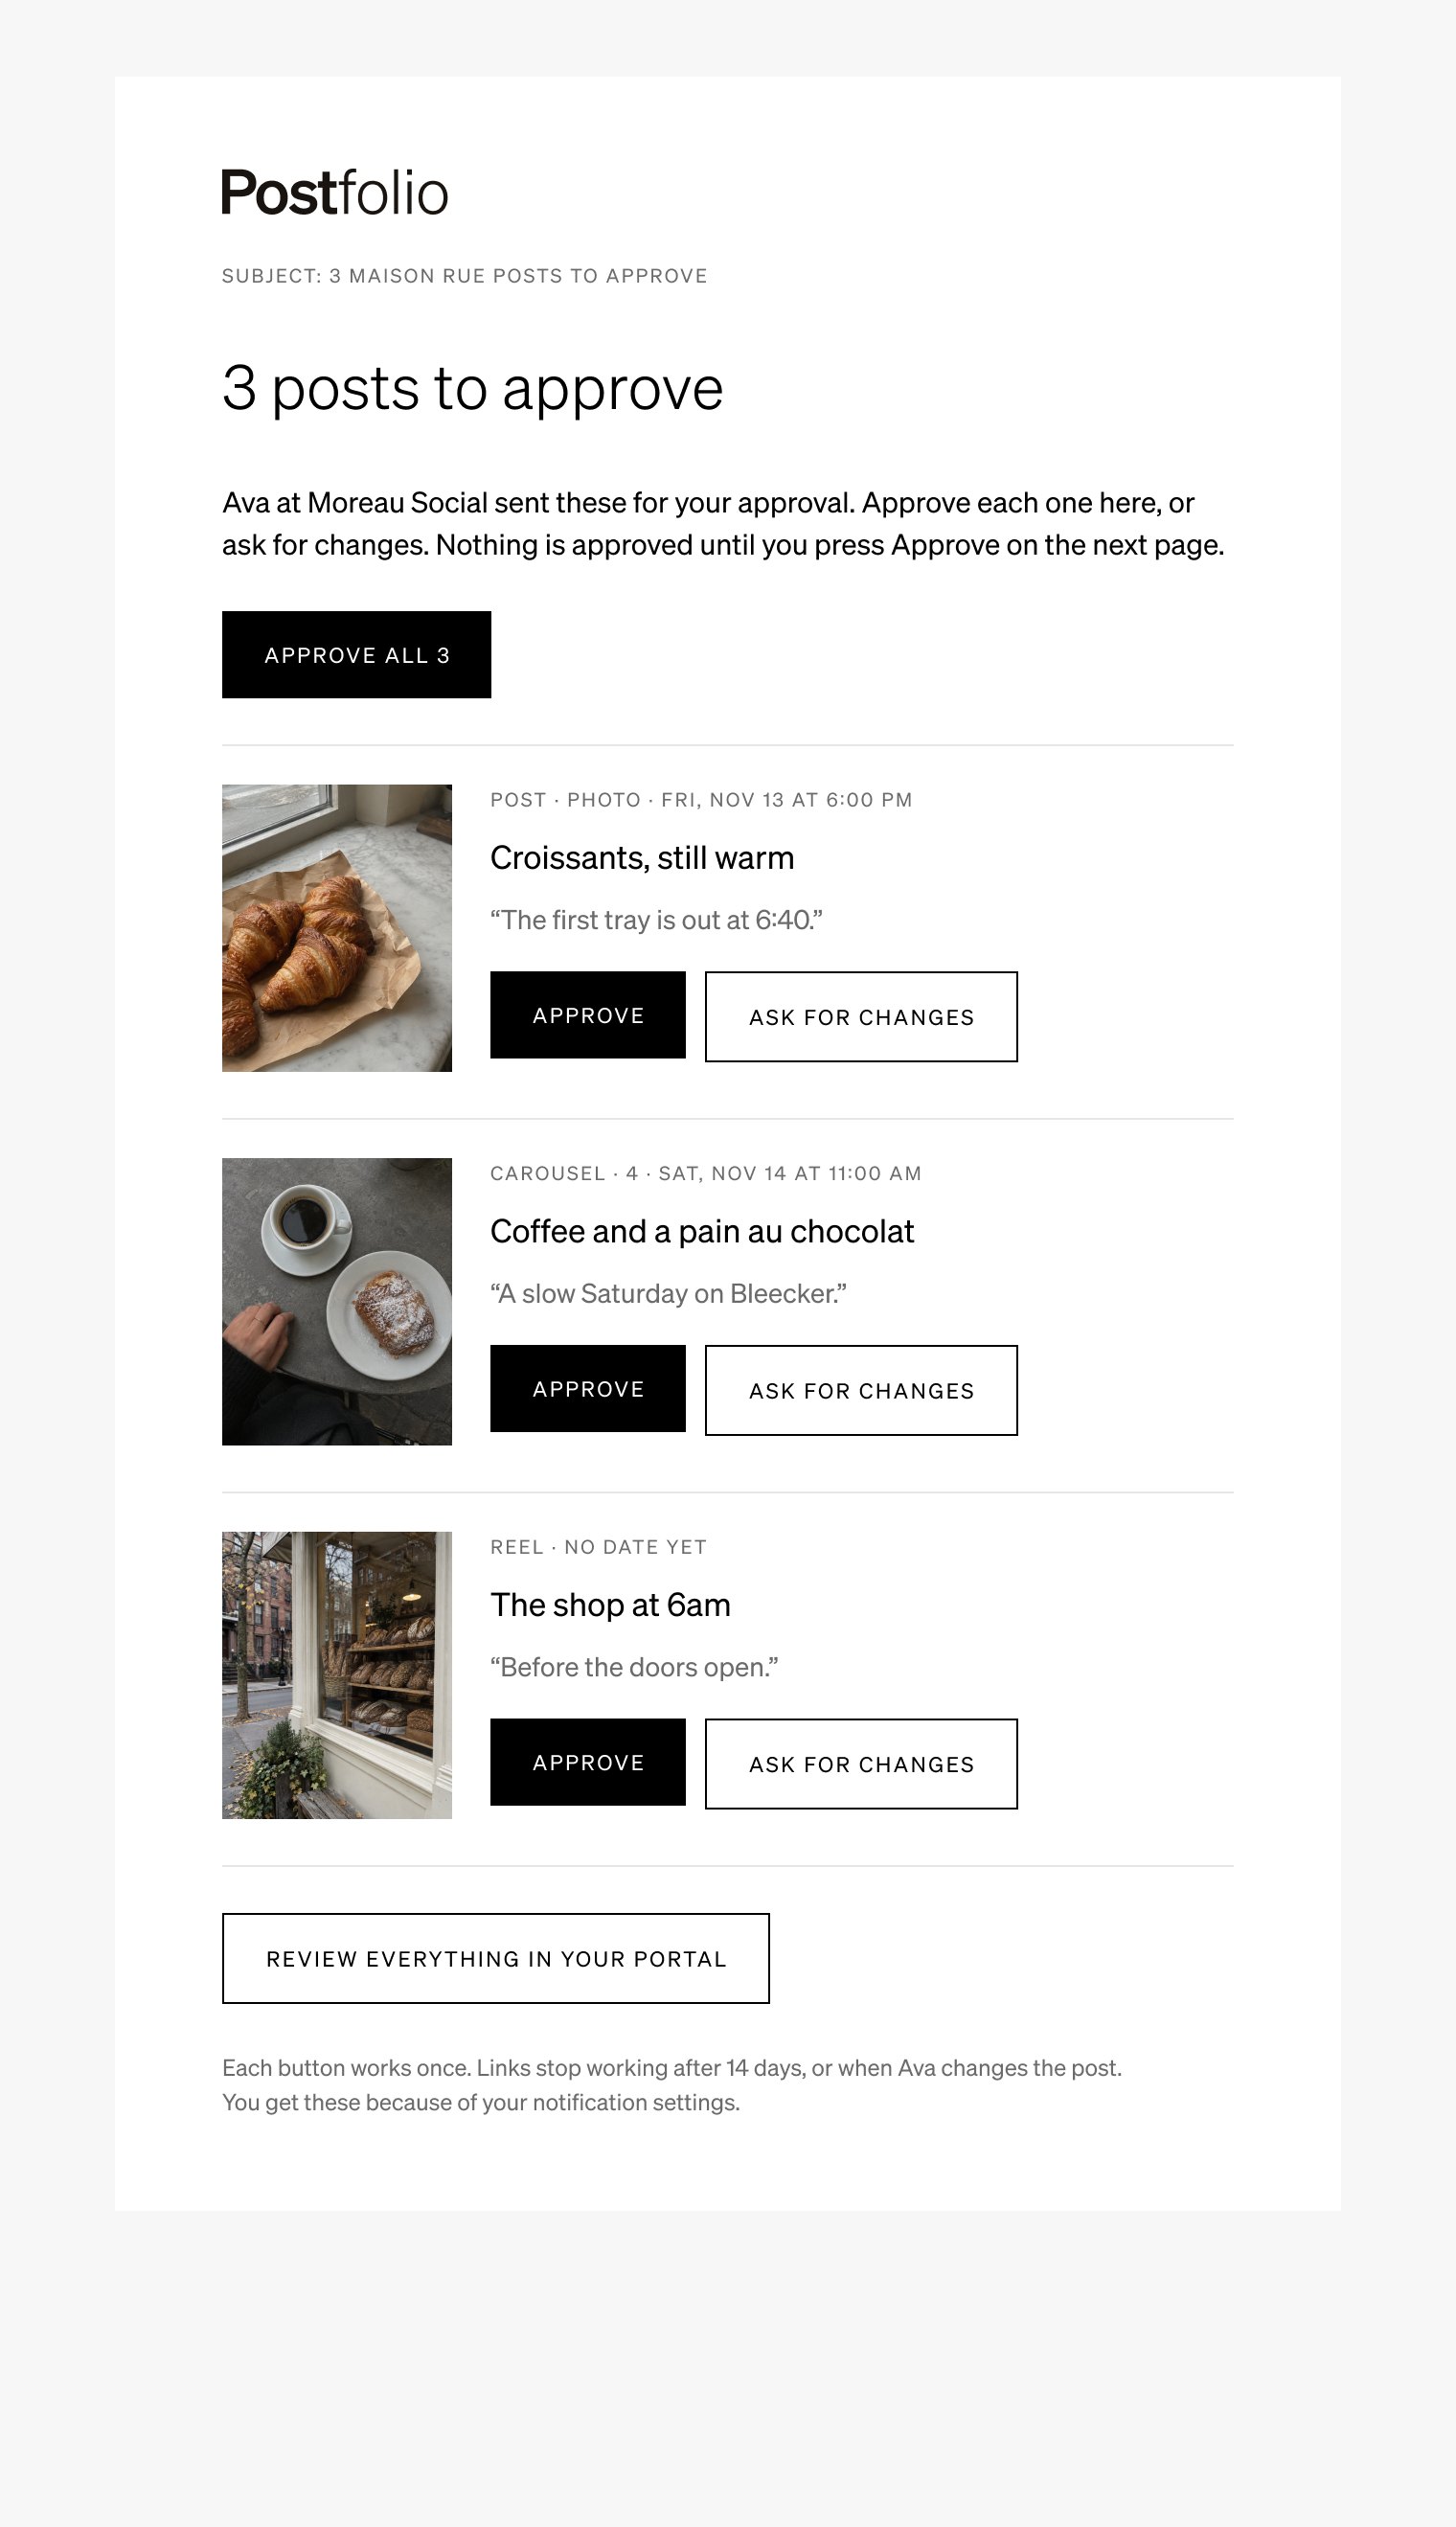
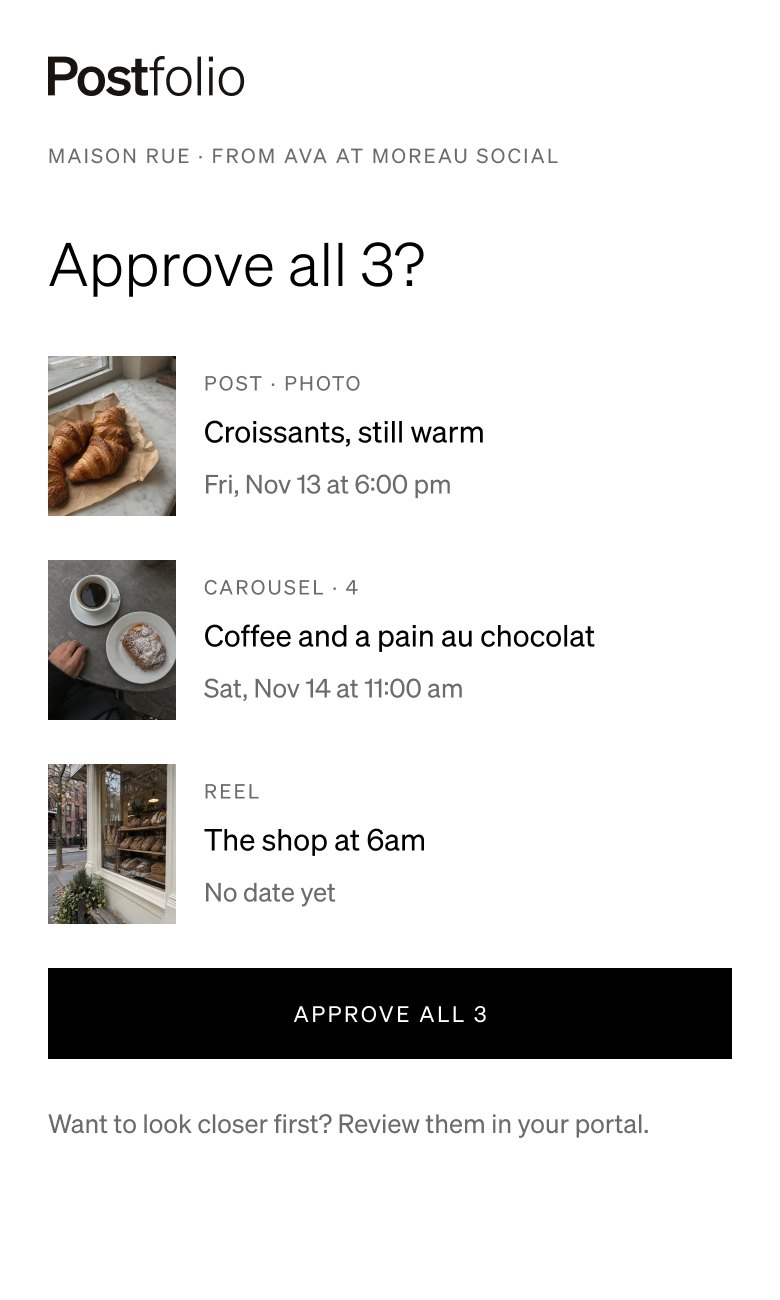
The email lists each post with its cover, format, date and time, and the first line of its caption, with Approve and Ask for changes under it. With more than one post, Approve all sits at the top. Review everything in your portal is at the bottom.
03
Approve
The client taps Approve and lands on a page that asks them to confirm, so a stray tap never approves anything. One more tap and it’s done. They don’t need to sign in.

04
Approved
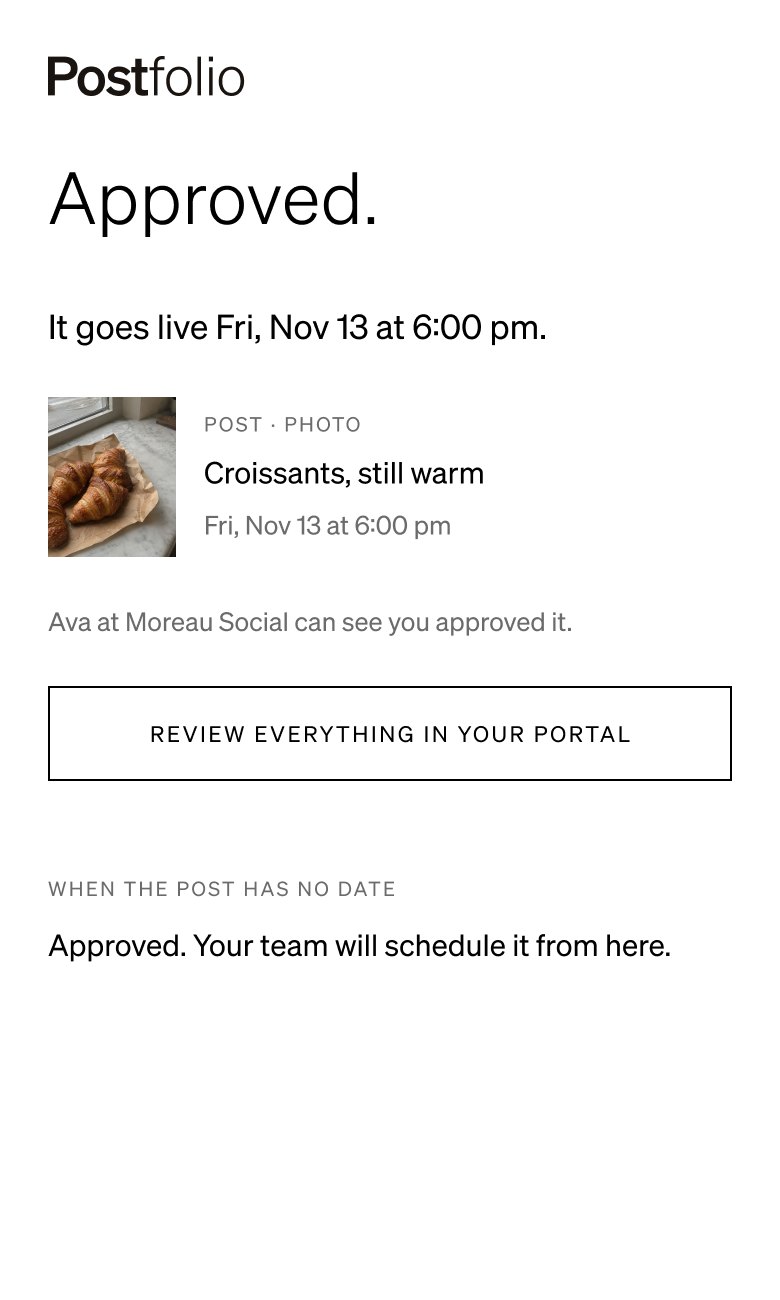
The page says when the post goes live, for example Fri, Nov 13 at 6:00 pm. A post with no date says your team will schedule it from here.
05
Ask for changes
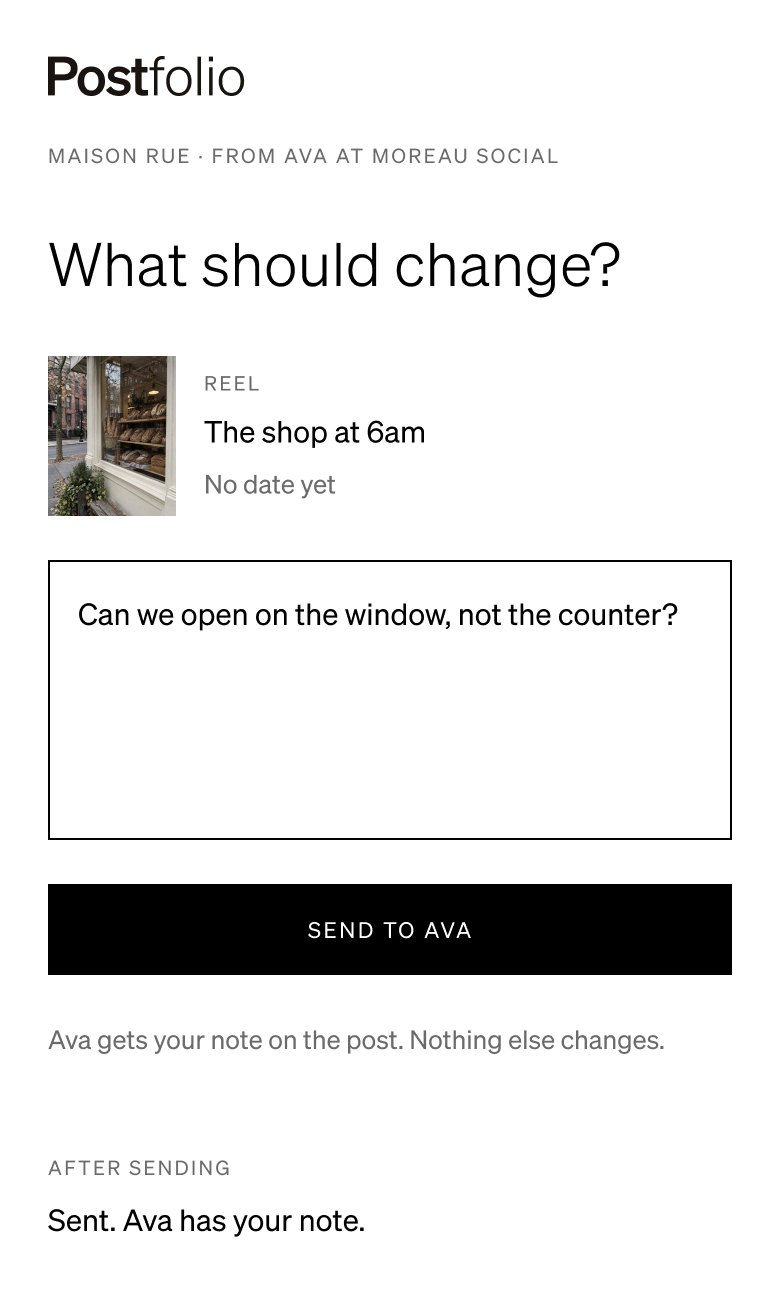
Ask for changes opens one note box. The note lands on that post, the same as a comment in the portal, and nothing else changes.
06
Approve all
With several posts, Approve all lists them on one page so the client can approve them together, or open the portal to look closer first.
07
What your team sees
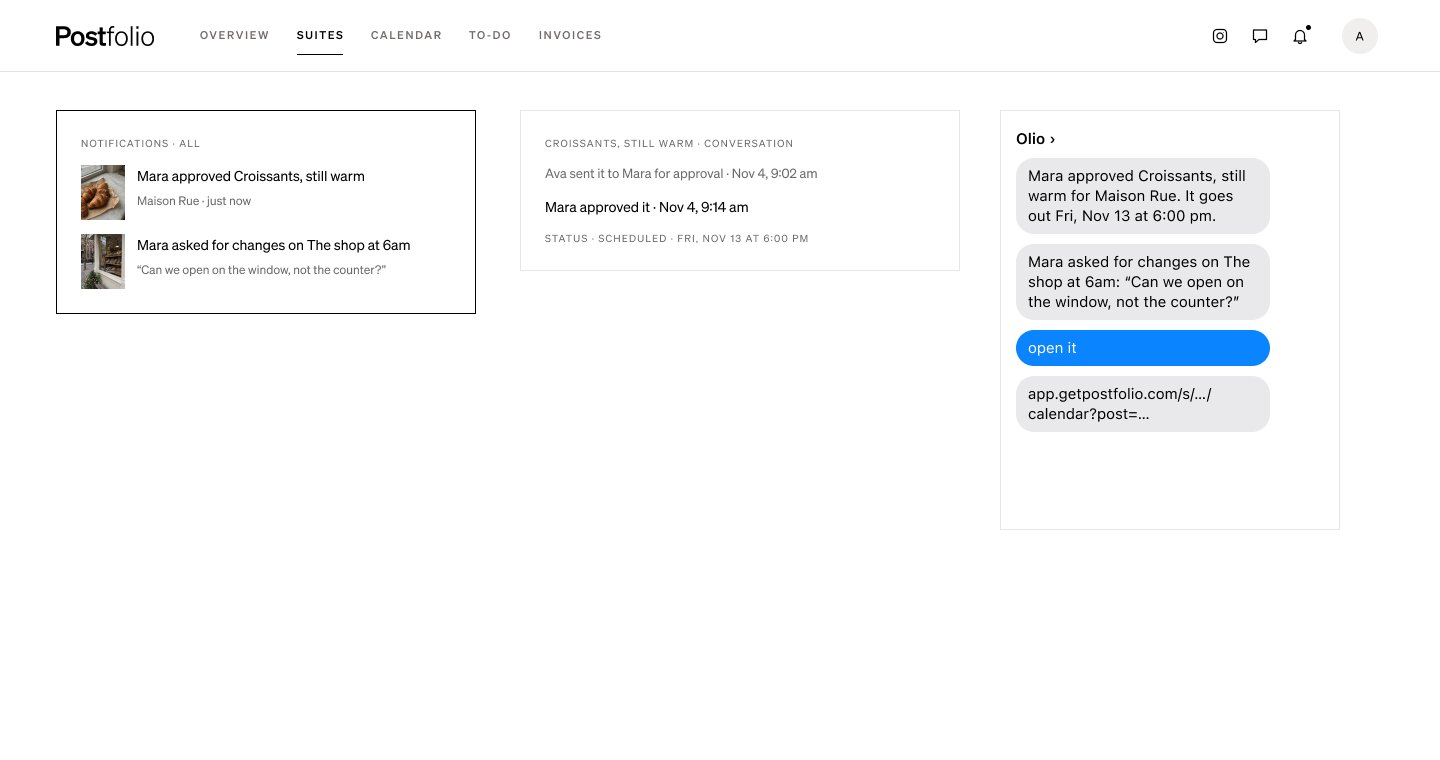
The approval shows in the bell and in the post’s history, and Olio texts you that the client approved from the email, with a link to the post.
08
Safe by design
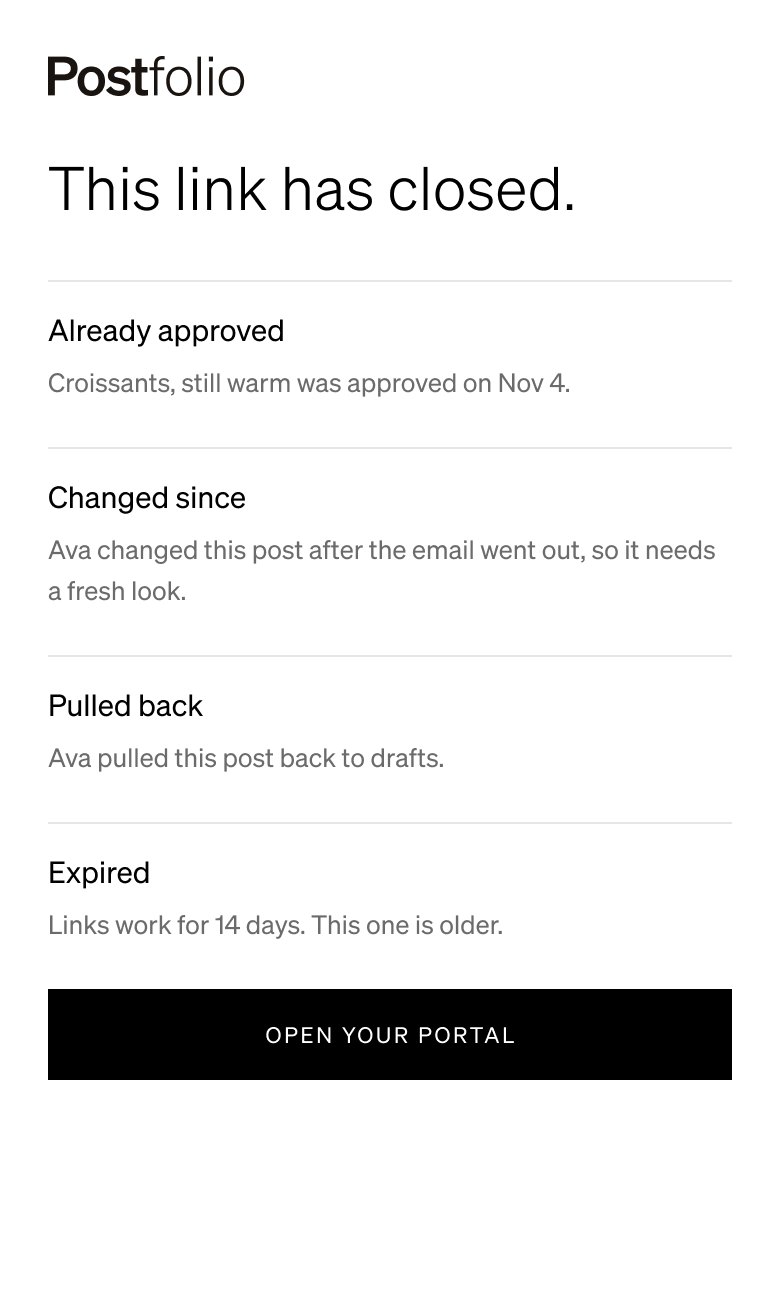
Each button works once. Links close after 14 days or when the post changes, and only the people who approve for the brand get the buttons.
Next tutorial
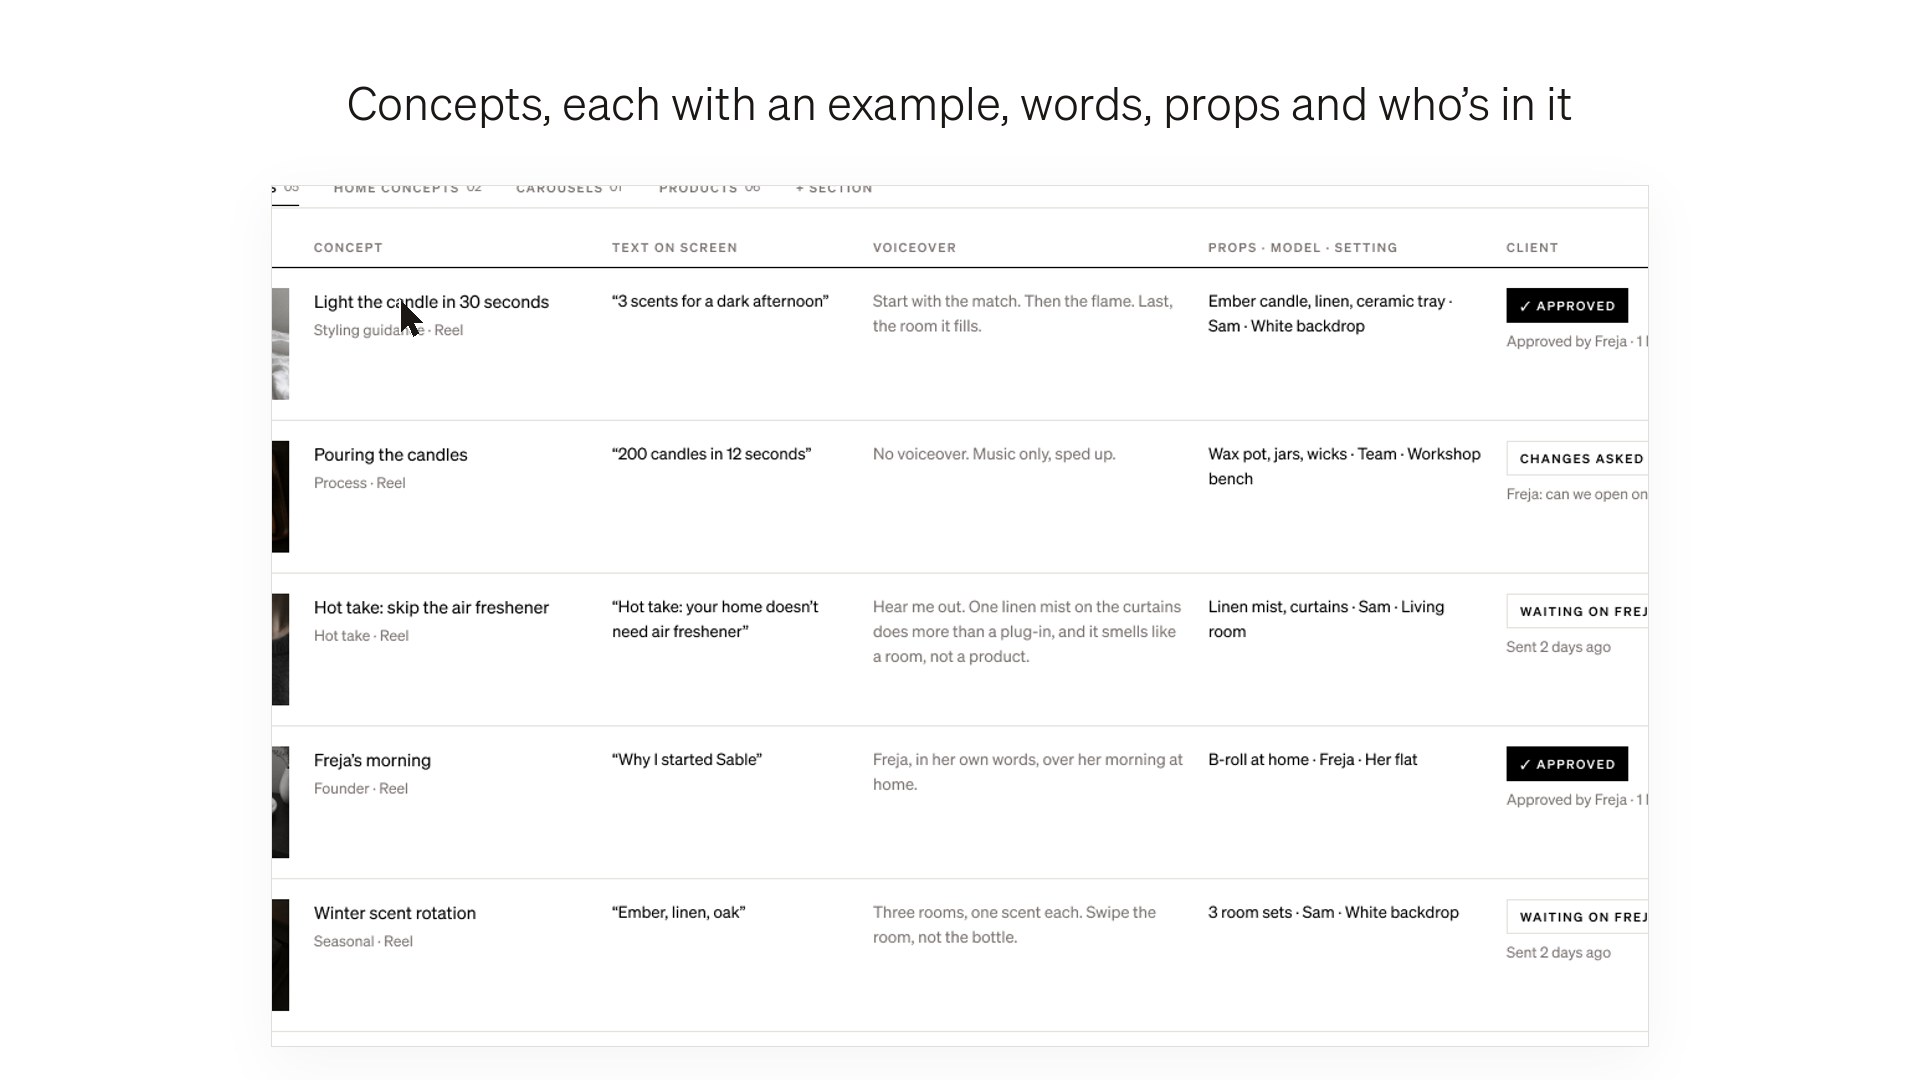 Plan a shoot with the Shoot Planner →Planning · 36 sec
Try it in Postfolio
Open Postfolio and follow the steps.
New to Postfolio? Every plan is $10 for the first month.
Still stuck? Write to us or book a walkthrough.